Linux Quick Start
Note
These quick start pages each show one specific way to create a karaoke from start to finish. If you need more context or other software options, use the links on the nav bar (or hamburger menu if you have a small screen).
Install Required Software
First, ensure you have wine installed. We are going to use it to run Karaoke Builder Studio. Almost all Linux distros have it in their repos and just call the package “wine”. There’s no need to make sure you have the latest from WineHQ - every version I’ve tried has worked fine.
If you do not have it already, you will also need winetricks to install the VB6 Runtime needed for KBS to install and run properly. You may have a package available in your distribution for it (usually just called “winetricks”). If not, manual download information is available.
Once that’s installed, run the following command to install the runtime:
winetricks vb6run
You can alternatively use the winetricks GUI to choose the option to “Install a Windows DLL or component” and choose vb6run that way.
As with any wine commands, it can be run in a prefix instead of .wine in your home directory (see this FAQ entry for more info)
Next proceed with KBS:
Download Karaoke Builder Studio
Wine is likely to be your default handler for .exe, so you can probably just double-click the installer like on Windows. If not, it should be in your right-click “Open With” menu or equivalent, using the “Run an arbitrary executable” option in the winetricks GUI, or failing all that, just manually run “wine kbstudio.exe” from the directory where it’s been downloaded.
Separate Audio
If you already have a backing track, feel free to skip this part (but don’t take the audio from commercial karaoke, see Why we use original audio).
Find the highest quality version of the track you can. If you can get flac from Bandcamp or similar, that’s your best bet.
Run a vocal removal model:
Go to the x-minus vocal remover page.
Select the “mel-roformer” AI model, or “mel-roformer (kar)” if you want backing vocals. If these models are no longer available in the free version, you can use their “Vocal remover” or “Keep backing vocals” shortcut links to get to the best they’ll offer.
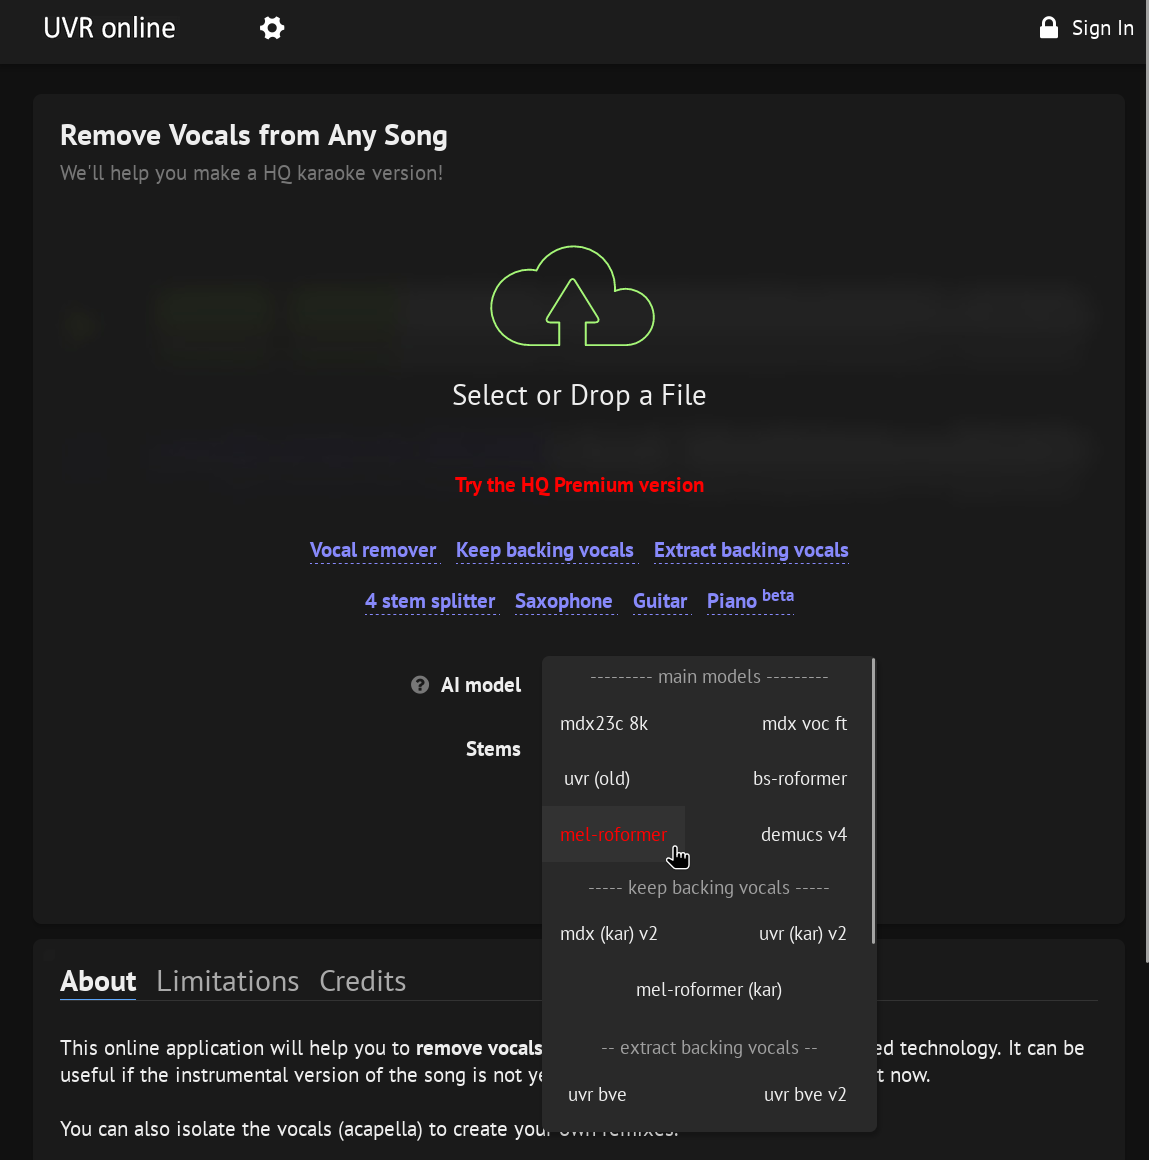
Drag and drop your high quality audio file.
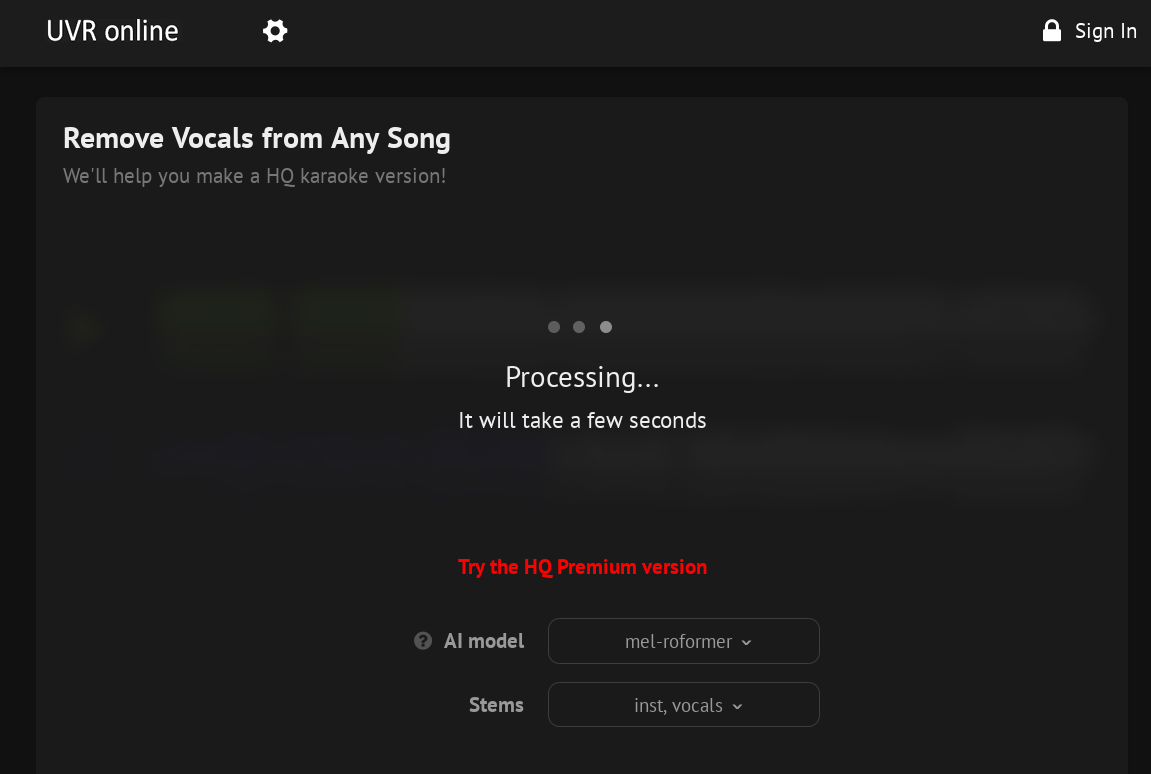
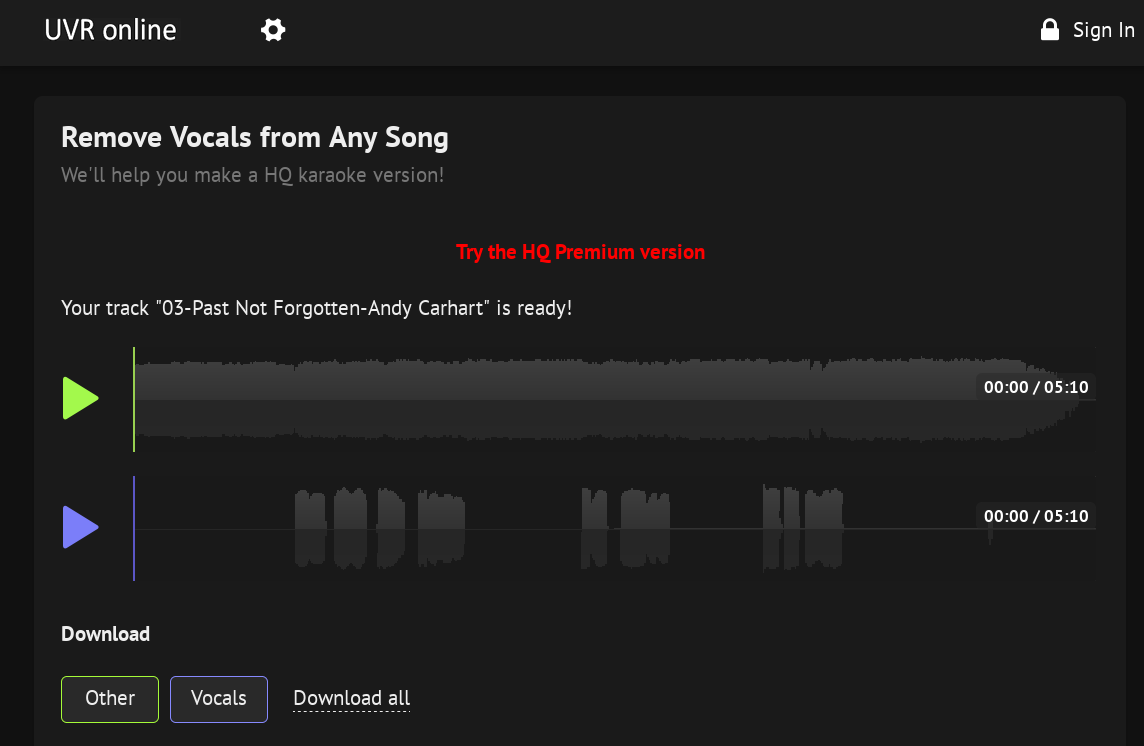
Set the format as desired (if option is available) and download the Instrumental/Other and Vocals stems it generated.
Format Lyrics
Now we need lyrics in a good format for karaoke.
Find accurate lyrics
If there’s official lyrics on the band’s Bandcamp or YouTube video description, great, use those. If there’s a devoted fan community site (e.g. Weird Al Wiki or TMBW), also a great resource. Failing that, Genius usually does ok.
Listen to the song while reading through the lyrics and make sure things match up. Sometimes a line needs to be doubled, or an ad-lib needs to be added. The more accurate it is, the easier it will be to sync, and the less editing will be needed after.
Organize into pages
Only so many lines of text can be shown on a screen at a time so it helps to split in logical places. Usually lyrics sites will at least split between verses and chorus, but if e.g. a verse is 8 lines, you may want to split that into two blocks of 4. Some lines may be very long and need split as well.
Add syllable marks
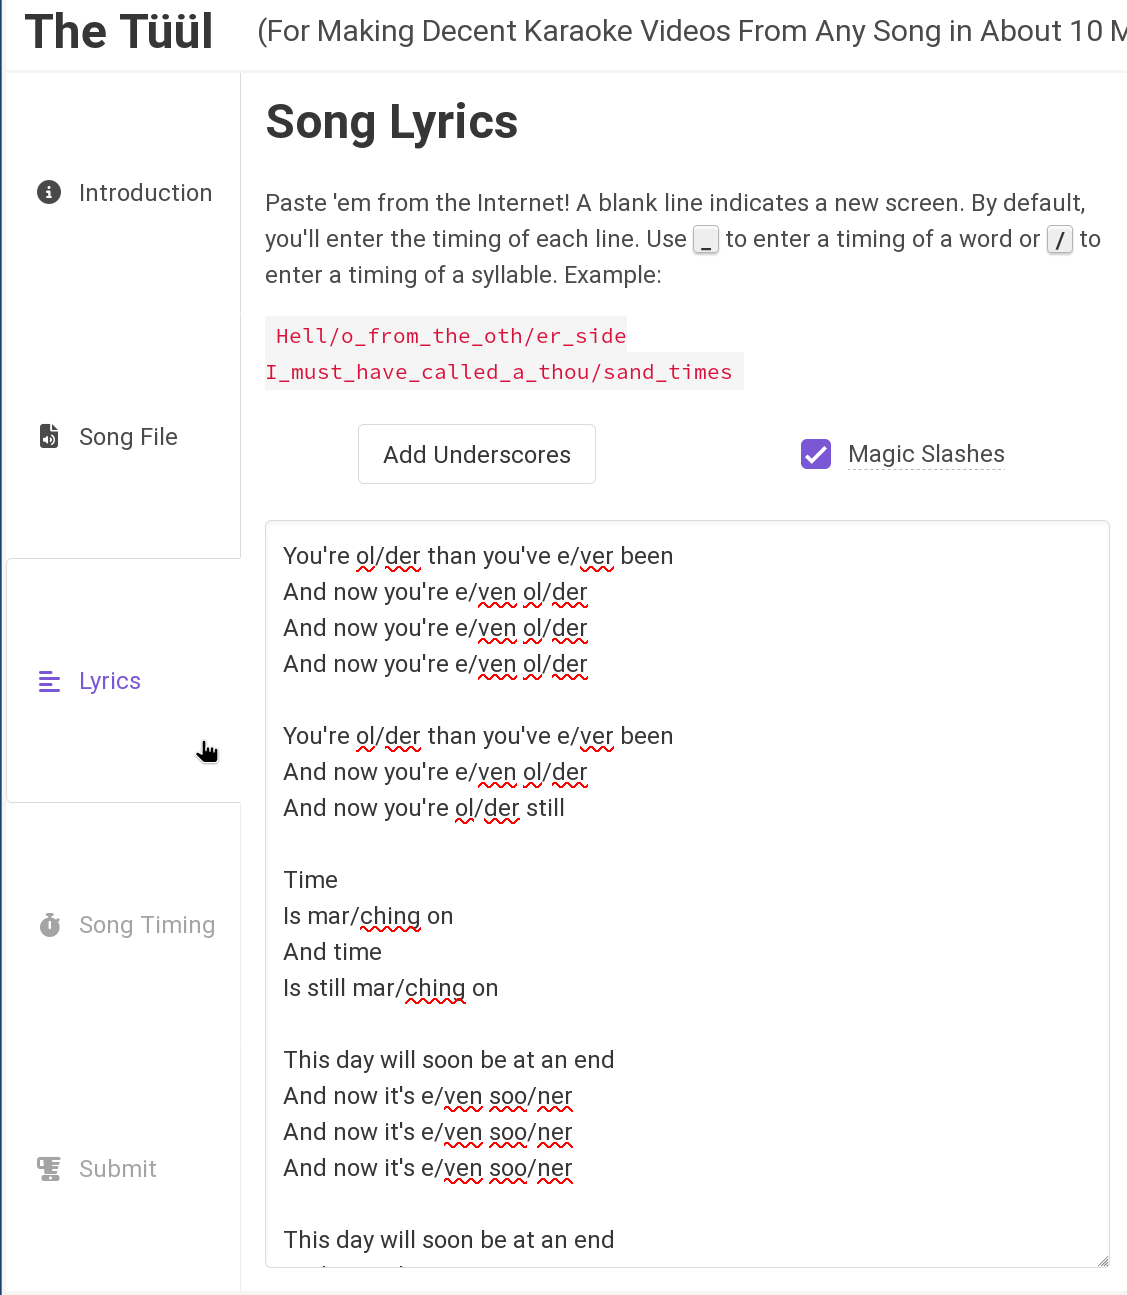
This is technically optional, but it really does help make the sync look more accurate, especially for sustained words. Add a slash (“/”) between syllables to have them operate as separate units during syncing.
It may be helpful to use the Magic Slashes feature on The Tüül: Paste your lyrics into the lyrics tab then start adding slashes as normal. If it sees a word repeated later in the lyrics, it will automatically add slashes to the same place in that instance of the word.
Sync Lyrics
OK, it’s finally time to start the graphics.
Open Karaoke Builder Studio.
If it opened an existing project, hit the New button.
Paste your lyrics into the big text box.

Click on each block of text and make sure all the lines are visible and text is not going off screen. If any is, add line breaks as needed.
Click the audio button and add your audio file (either the full audio or vocal stem, not the instrumental).
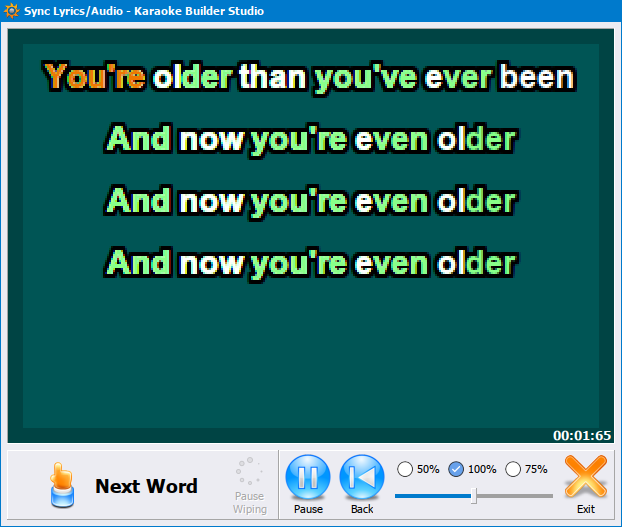
Hit the Sync button. It will immediately start playing the music.
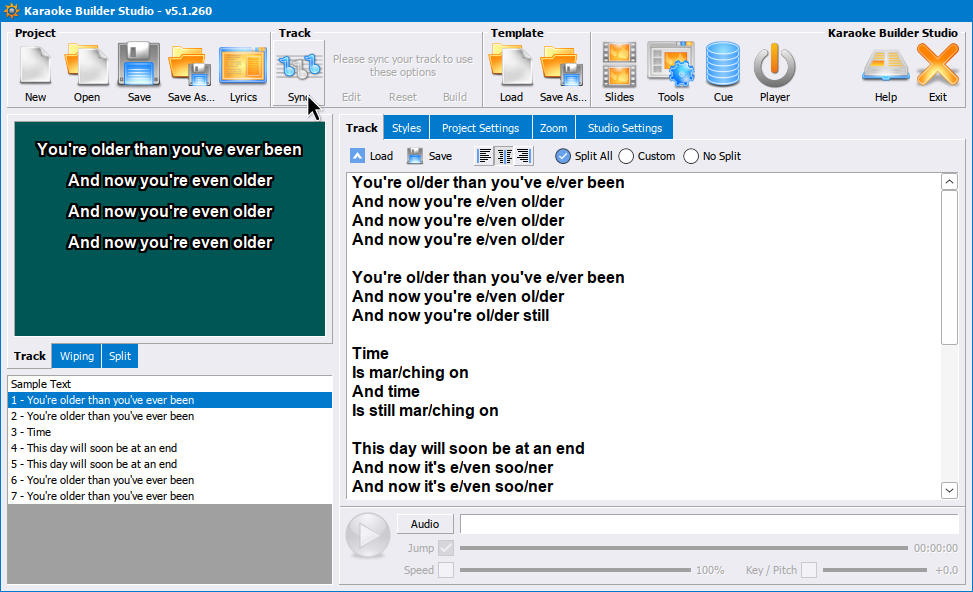
The next word/syllable is marked in orange. Hit space on your keyboard when the audio for it plays.
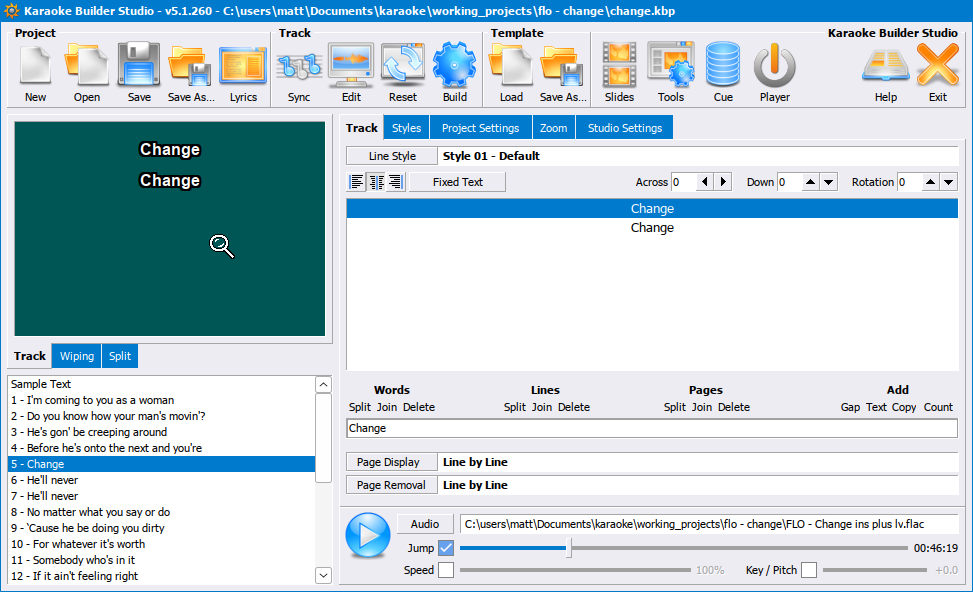
Click the audio button and switch to the instrumental version you will use for your final track.
There are some other features in the sync UI, and a ton of editing and styling options we haven’t touched, but this is a Quick Start, so those are the essentials.
CDG Output
CDG output is possible in Linux, but it is a little tricky to get working. You need to ensure Anti-aliasing/sub-pixel hinting is disabled in your window manager when you launch KBS. You can turn it back on after starting KBS. There are settings in Wine related to font smoothing, but they don’t seem to have any effect, at least in modern versions of Wine. You can verify if your font hinting settings are properly disabled by viewing the full screen preview by clicking on the preview box from the main screen.
If you have hinting turned on, you’ll see multiple colors or shades of gray.

What you want to see is solid colors.

If you don’t have that working or your desktop environment doesn’t have the options for it, you can try setting it with xrdb (should work with X11 and Xwayland). Create a file with your current Xft options by doing the following:
mkdir -p ~/.config/kbs
xrdb -query|grep Xft > ~/.config/kbs/xft-orig
Then create a file with the hinting options turned off:
cat <<'EOF' > ~/.config/kbs/xft-kbs
Xft.autohint:       1
Xft.antialias:      1
Xft.rgba:   rgb
Xft.hintstyle:      hintfull
EOF
Now you can toggle between the two with the xrdb command:
xrdb ~/.config/kbs/xft-kbs
xrdb ~/.config/kbs/xft-orig
Note that the Xft settings apply to new X windows created after the settings were put into place, not existing ones. So it is sufficient to turn off hinting, launch KBS, then turn it back on.
You can also make a script to launch KBS if you would like
mkdir -p ~/.local/bin
cat <<'EOF' > ~/.local/bin/kbs
#!/usr/bin/env bash
#export WINEPREFIX=... # Fill in with your wine prefix if not .wine
cd $(dirname "$1")
wineboot # Ensure wine environment is loaded up so KBS will launch right away
xrdb $HOME/.config/kbs/xft-kbs
sleep 2
# Leave as is for a 32-bit wine prefix, comment out the first and uncomment the second for a 64-bit one
wine "C:\\Program Files\\Karaoke Builder Studio 5.1\\kbpro.exe" "$(winepath -w "$1")" &
#wine "C:\\Program Files (x86)\\Karaoke Builder Studio 5.1\\kbpro.exe" "$(winepath -w "$1")" &
sleep 2
xrdb $HOME/.config/kbs/xft-orig
EOF
Ensure ~/.local/bin is in your $PATH, then you can run the kbs command to launch KBS. On some common bash configurations, like the default in Ubuntu, it’s only added if the directory exists, so if it was newly created here, you may have to restart your session or source your profile script.
Once you’ve confirmed you have it configured correctly, you can generate a CDG through the Build button. Note that if you’re using the trial of KBS, the output will not be fully usable, but will be good enough to see that it worked.
The Slides feature (not covered by this tutorial, but commonly used with CDG output) does not currently work in Wine. It seems to be an issue with the ole32 and oleaut32 implementations. You can still embed existing CDG slideshows and use the Intro/Outro options, just not create new ones with the Slides tool.
Video Output
You may have noticed CDG has a resolution of 300x216, which looks really blocky and outdated on today’s high-resolution screens. Sadly, the video output option in KBS will not help with this. It merely enlarges the blocky pixels instead of scaling the text properly.
One solution is to use kbp2video.
Open a terminal and create a Python3 venv:
mkdir kbp2video_venv
cd kbp2video_venv
python3 -m venv .
. bin/activate
Install kbp2video into it, then you can run it
pip install kbp2video
kbp2video
To access in the future, you can either run the
activateandkbp2videoagain, or just use the bin/kbp2video script it created directly.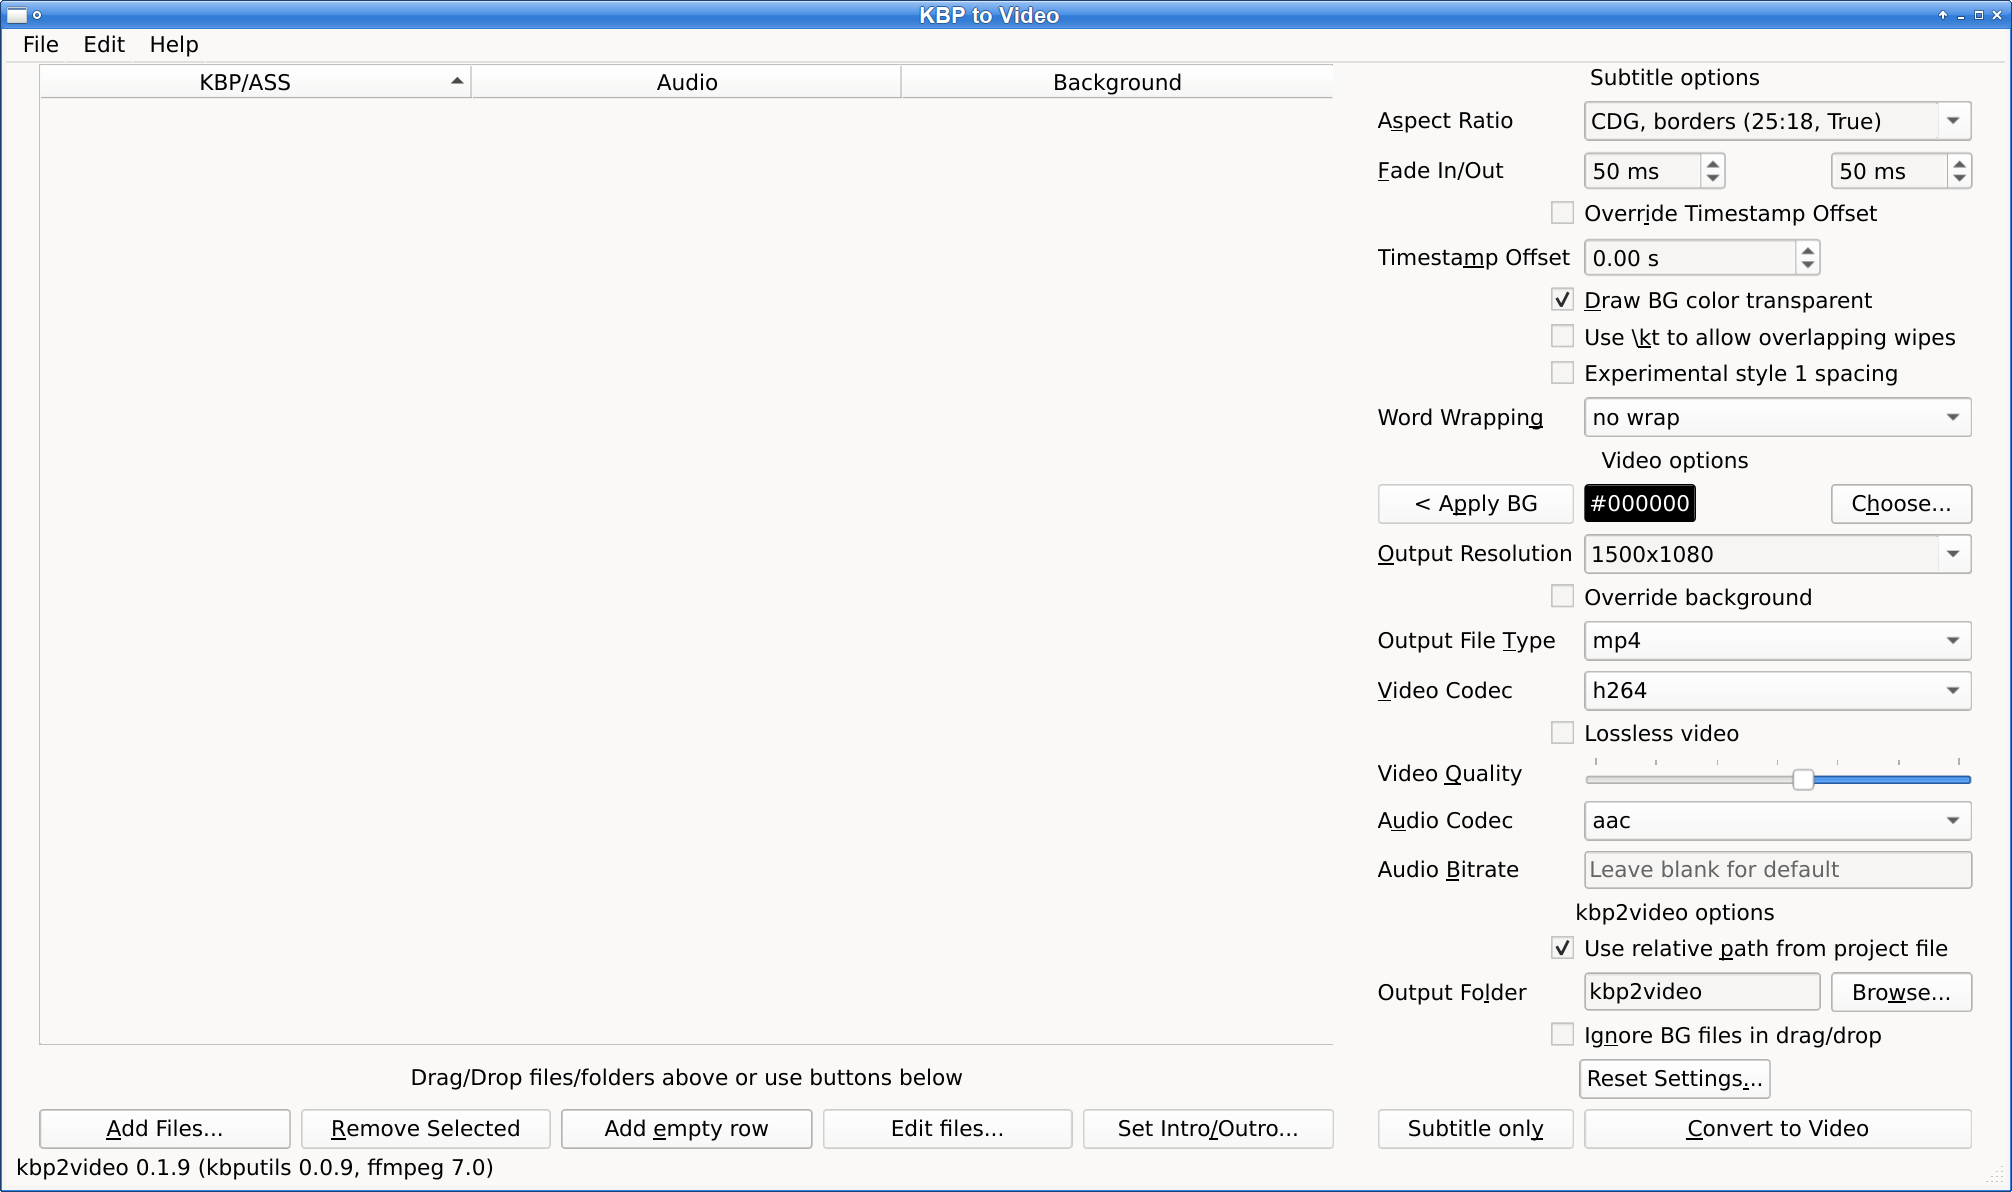
Drag and drop your .kbp file into the UI.
Hit the Convert to Video button.
Now you should have a kbp2video folder alongside the project and a nice mp4 video file in it.
Upload to YouTube
Create a channel. You can use an existing Google account, but it’s better if you create a new one.
Go to the Upload page.
Drop in your video file.
Edit the title and description and wait for it to upload and process.
Follow-up steps
Learn more about Karaoke Builder Studio with some background and video tutorials.
View a comparison of karaoke software to see if any would work better for you.
Read about Vocal Isolation and Ultimate Vocal Remover (UVR) to help decide if you want to continue with x-minus or try one of the other options. Note that it can be a little tough to get UVR running on Linux since they don’t provide an installer or package for it.
Purchase a subscription for x-minus (click the link to try Premium)
Install Audacity to edit your audio files if the stems directly from x-minus aren’t quite good enough (it should be in your distro’s repo).
Set up a Google Drive for KJs to use for offline shows.
Apply for a channel on the Discord (once you get to 10 videos).